
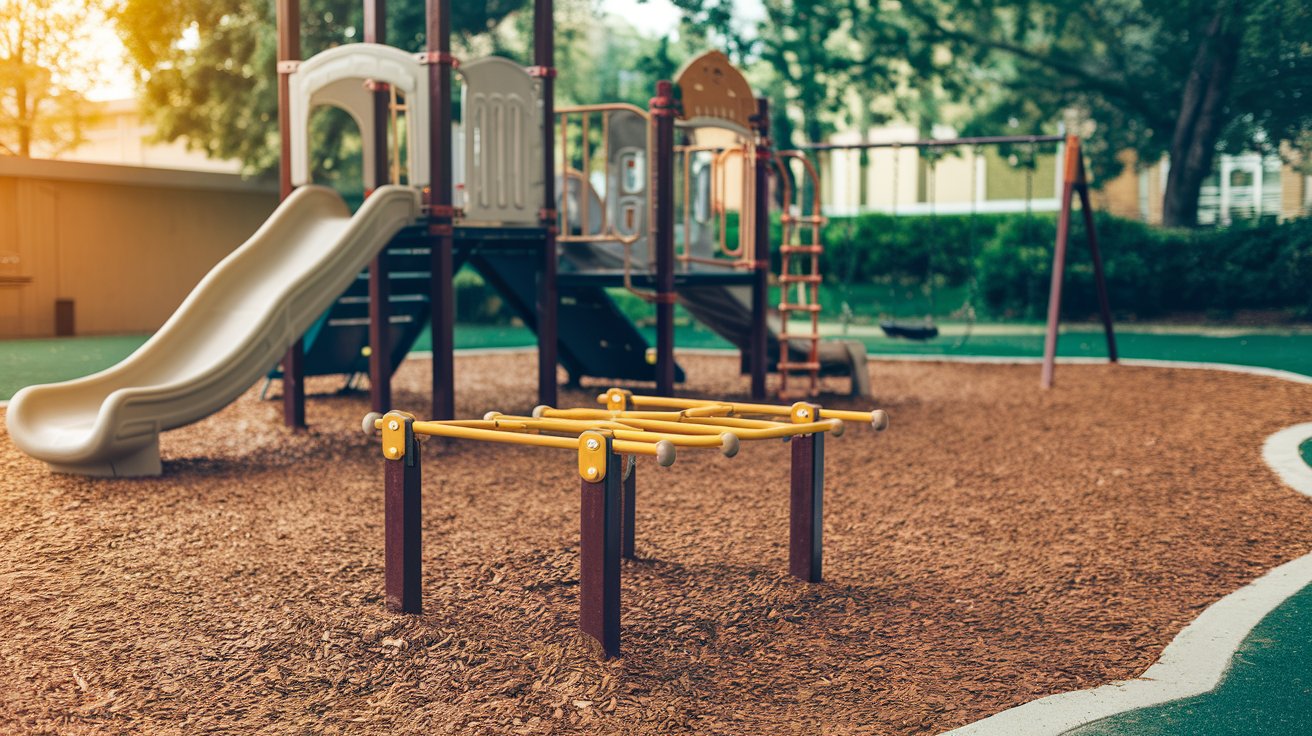
Installing rubber mulch on playgrounds requires careful planning and execution to ensure child safety and long-term durability. This comprehensive guide covers everything from site preparation to final installation, helping you create a safe playground surface that meets 2026 ASTM F1292 and F1951 standards. Whether you’re a DIY homeowner or facility manager, proper rubber mulch installation protects children from fall injuries while providing a low-maintenance, durable surface.
Understanding Rubber Mulch for Playground Safety
Rubber mulch has become the preferred playground surfacing material across the United States, with over 68% of commercial playgrounds adopting it by 2026. Made from recycled tires, this material provides superior impact absorption compared to wood chips or gravel. The rubber undergoes a rigorous cleaning process to remove steel belts and contaminants, then gets shredded into uniform nuggets ranging from 0.5 to 2 inches in size. Modern manufacturing techniques in 2026 ensure the material is non-toxic and meets all EPA standards for playground use.
The safety benefits of rubber mulch are substantial. According to the National Program for Playground Safety, proper installation reduces serious head injuries by up to 75% compared to hard surfaces. The material maintains its shock-absorbing properties in all weather conditions, unlike sand that compacts or wood chips that deteriorate. For playgrounds in the United States, choosing the right rubber mulch depth based on equipment height is critical for meeting safety regulations and protecting children during play.
Pre-Installation Site Assessment and Planning
Before beginning any rubber mulch playground installation, conducting a thorough site assessment prevents costly mistakes and ensures compliance with safety standards. Measure the entire play area, noting equipment locations, fall zones, and high-traffic pathways. The Consumer Product Safety Commission recommends extending the mulched safety zone at least 6 feet in all directions from stationary equipment and twice the height of swings both front and back. Document existing drainage patterns, as proper water management is essential for preventing pooling that can degrade the rubber over time.
Measuring Critical Fall Height Zones
Determining the critical fall height for each piece of playground equipment directly impacts your rubber mulch depth requirements. Measure from the highest designated play surface to the ground below. For climbers and platforms, this measurement dictates the minimum mulch depth needed to meet ASTM F1292 standards. In 2026, most playground equipment manufacturers clearly label the critical fall height on their products, simplifying this process. Use a laser measuring tool for accuracy, especially on taller structures like slides and climbing walls that may require 9-12 inches of compressed rubber mulch depth.
Soil and Drainage Evaluation
Proper drainage system assessment prevents water accumulation that can create safety hazards and shorten your rubber mulch lifespan. Test soil permeability by digging a 12-inch hole and filling it with water. If water drains within 24 hours, your natural drainage may be adequate. Clay-heavy soils common in regions like Texas and the Southeast require additional drainage solutions. Create a gentle slope of 1-2% away from play equipment toward designated drainage areas. For playground installations in areas with high water tables, consider installing perforated drainage pipes beneath the base layer to channel water away from the play surface efficiently.
Essential Site Preparation Steps
Proper site preparation forms the foundation for a successful rubber mulch playground that lasts 12-15 years. Begin by removing all existing surface materials including grass, weeds, roots, and rocks down to stable subsoil. The excavation depth depends on your total system design but typically ranges from 6 to 14 inches below the finished surface grade. Remove any organic materials that could decompose and create settling issues. For areas with existing vegetation, apply a non-toxic herbicide approved for playground use three weeks before excavation to prevent regrowth that can push through your base layers.
Compact the exposed subsoil using a mechanical plate compactor, making multiple passes in different directions to achieve uniform density. This base preparation step prevents future settling that creates uneven surfaces and safety hazards. The compacted base should be firm enough that walking on it leaves minimal footprints. For larger playground installations exceeding 1,000 square feet, consider renting a ride-on roller compactor for more efficient coverage. Proper compaction reduces long-term maintenance costs and ensures consistent rubber mulch depth across the entire play area.
Installing Perimeter Borders and Containment
Installing retaining borders around your playground prevents rubber mulch migration and maintains proper safety depths. Treated lumber timbers, recycled plastic borders, or poured rubber curbing all provide effective containment. For a standard residential playground, 6×6-inch treated timbers anchored with 18-inch rebar stakes every 4 feet create a durable perimeter. The border height should extend 2-3 inches above the finished mulch surface to contain material during active play. Commercial installations benefit from interlocking rubber borders that absorb impact and eliminate trip hazards at playground edges.
Secure borders must be properly anchored to prevent shifting from frost heave or lateral pressure from the rubber mulch. In northern states where frost penetration exceeds 18 inches, extend anchor stakes below the frost line or use concrete footings for permanent installations. Create smooth transitions at entry points using beveled edges or ramps that comply with ADA accessibility requirements. The border installation process typically takes 4-6 hours for a 400-square-foot playground area and should be completed before laying landscape fabric or drainage layers.
Laying Geotextile Fabric and Drainage Layers
Installing commercial-grade landscape fabric prevents weed growth while allowing water to drain through to the soil below. Choose non-woven geotextile fabric rated at 3-4 ounces per square yard specifically designed for playground applications. Roll out the fabric across the entire prepared base, overlapping seams by 12 inches and securing with landscape staples every 2 feet. For areas with persistent weed problems, double-layer the fabric with seams offset to eliminate any gaps. The filter fabric extends up the inside face of border materials and gets trimmed flush with the top edge after rubber mulch installation.
In regions with heavy rainfall or poor natural drainage, add a 2-3 inch layer of crushed stone or pea gravel between the compacted base and landscape fabric. This drainage layer facilitates rapid water movement away from the play surface. Grade the stone base with a slight slope toward drainage points, maintaining a minimum 1% gradient. For playground installations in flood-prone areas, incorporate perforated drain pipes at the lowest points, connecting them to storm drains or dry wells. Proper drainage installation prevents standing water that can harbor mosquitoes and create slip hazards on rubber surfaces.
Rubber Mulch Installation Process
The actual rubber mulch installation requires systematic spreading and leveling to achieve uniform depth across all critical fall zones. Begin by calculating the total cubic footage needed based on your playground area and required depth. As a general rule, one cubic foot of rubber mulch covers approximately 1.5 square feet at a 4-inch depth. For a typical backyard playground measuring 12×16 feet requiring 6 inches of depth, you’ll need roughly 16 cubic yards of material. Order 10% extra to account for settling and high-impact zones that may need additional coverage.
Start spreading rubber mulch from the farthest point from your material delivery location, working backward toward the entry point. Dump bags or pour loose mulch in piles across the play area, then spread using a garden rake or specialized mulch spreader. Distribute material evenly, checking depth frequently with a ruler or marked stake. Pay special attention to high-traffic areas beneath swings and at slide exits where children land repeatedly. These zones benefit from an additional 1-2 inches of rubber mulch beyond the minimum safety depth to compensate for compression from repeated impacts.
Achieving Proper Installation Depth
Understanding how deep rubber mulch needs to be for playground safety depends entirely on your equipment’s critical fall height. ASTM F1292 testing establishes minimum compressed depths that provide adequate impact attenuation. For equipment with fall heights up to 4 feet, install rubber mulch to a minimum depth of 6 inches. Heights from 4-7 feet require 9 inches, while 7-10 foot heights need 12 inches of compressed mulch. Always verify these requirements against your specific product’s test data, as rubber mulch from different manufacturers may have varying performance characteristics.
The installation depth you initially spread will compress 10-15% during the first few months of use and settling. Account for this by adding 1-2 inches to the minimum required depth during installation. Use multiple measuring points across the playground to ensure consistent coverage, checking every 4-6 feet in both directions. Mark permanent depth gauges on equipment posts or border timbers to simplify future maintenance inspections. For commercial playground installations that must pass safety audits, document depth measurements with photographs and written records to demonstrate compliance with safety standards.
Color Selection and Aesthetic Considerations
Modern rubber mulch comes in a wide spectrum of colors beyond basic black, allowing creative playground designs that appeal to children. Popular 2026 color choices include safety red, forest green, royal blue, and earthtone brown. Consider that darker colors like black and brown absorb more heat in direct sunlight, potentially reaching surface temperatures 20-30 degrees higher than lighter colors. In southern states with intense summer sun, choose lighter shades or plan for shade structures to prevent burn hazards on exposed surfaces.
Create visual interest and define play zones using multiple colors in your playground design. Separate colors for different activity areas helps with organization and adds educational elements for younger children learning colors. Mix colors by creating defined borders between sections rather than blending them together, as the different rubber densities can cause color separation over time. When selecting colors for your rubber mulch playground installation, request samples to evaluate how they look against your equipment and surrounding landscape. Quality rubber mulch maintains its color for 10-12 years without fading, unlike wood mulch that weathers quickly.
Installing Rubber Wear Mats in High-Traffic Areas
Incorporating rubber wear mats beneath swings, at slide exits, and under climbing structure access points significantly extends your playground’s lifespan. These interlocking or solid rubber tiles install directly on top of the compacted base before adding loose rubber mulch around them. Standard wear mats measure 2×2 feet with a thickness of 2-2.5 inches, providing concentrated impact protection in zones that experience the most intensive use. Position mats to extend at least 3 feet in the direction of travel for slides and throughout the entire swing fall zone.
Secure rubber tiles using the manufacturer’s recommended fastening system, typically interlocking edges or underground stakes. For permanent installations, apply outdoor-rated adhesive between tiles to prevent shifting. Transition smoothly from wear mats to loose rubber mulch by beveling the mulch edges around the mat perimeter. This integration prevents trip hazards while maintaining continuous fall protection across the entire play surface. In commercial playgrounds, wear mats reduce the frequency of mulch replenishment in high-impact zones by up to 60%, lowering long-term maintenance costs significantly.
Post-Installation Compaction and Testing
After completing your rubber mulch installation, allow 48-72 hours for initial settling before conducting safety testing. Walk the entire play area to identify any low spots or areas where mulch has shifted. Add additional material to maintain consistent depth specifications, focusing on zones beneath and around equipment where children will land. Light rainfall during this initial settling period actually benefits the installation by helping the rubber particles nest together more effectively.
Conduct a critical fall height test using either professional testing equipment or the simple drop test method for residential installations. The drop test involves releasing a test sphere from the equipment’s critical fall height onto the surface and measuring deceleration. While informal, this provides a general indication that your depth is adequate. For commercial installations requiring certification, hire a Certified Playground Safety Inspector to perform standardized ASTM testing and provide documentation. Proper testing ensures your playground surface meets safety requirements and protects against liability concerns.
Rubber Mulch Installation Cost Factors
The rubber mulch installation cost for playgrounds varies significantly based on project size, site preparation requirements, and regional labor rates. As of 2026, bulk rubber mulch typically costs between 5.50 and 9.00 dollars per cubic foot, with colored varieties at the higher end of the range. A standard 200-square-foot residential playground requiring 6 inches of depth needs approximately 9 cubic yards, totaling 800-1,400 dollars for materials alone. Bagged rubber mulch from retail stores costs considerably more at 6-8 dollars per 0.8 cubic foot bag, making bulk purchasing essential for projects exceeding 100 square feet.
Professional installation services add 2,000-5,000 dollars for complete playground surfacing projects, including site preparation, border installation, fabric laying, and mulch spreading. DIY installations save 60-70% of total costs but require proper equipment and 2-3 full days of labor for average-sized playgrounds. Additional cost factors include drainage system installation (300-800 dollars), rubber wear mats (15-25 dollars per square foot), and equipment rental for soil compaction and excavation. When budgeting for your project, allocate 10-15% extra for unexpected site issues like poor drainage or additional depth requirements discovered during installation.
Comparing DIY Versus Professional Installation
Deciding between DIY rubber mulch playground installation and hiring professionals depends on your skill level, available time, and project complexity. Homeowners with basic landscaping experience can successfully complete installations for residential playgrounds under 300 square feet. The process requires common tools including shovels, rakes, wheelbarrows, and a plate compactor (rentable for 50-80 dollars per day). Following proper procedures ensures your DIY installation meets safety standards while saving significant labor costs.
Professional installation makes sense for larger commercial playgrounds, sites with complex drainage issues, or when strict safety certification is required. Experienced contractors complete installations 3-4 times faster than DIY approaches and carry liability insurance covering the work. They also provide warranties typically ranging from 1-3 years on workmanship. For playground installations requiring ADA compliance, hiring certified professionals ensures all accessibility requirements are properly met. Request detailed quotes from at least three contractors, verifying their experience with rubber mulch specifically and checking references from recent similar projects in your area.
Long-Term Maintenance and Care
Maintaining your rubber mulch playground requires minimal effort compared to organic alternatives but still demands regular attention to preserve safety and appearance. Conduct weekly visual inspections during peak play seasons, checking for adequate depth in high-traffic areas and removing any foreign debris. Use a leaf blower or rake to remove leaves, twigs, and other organic materials that accumulate on the surface. Unlike wood mulch that decomposes and needs complete replacement every 1-2 years, rubber mulch lasts 12-15 years with only occasional replenishment of displaced material.
Schedule comprehensive maintenance inspections quarterly to address any developing issues before they become safety concerns. Check all border containment systems for stability, tightening fasteners and replacing damaged sections as needed. Measure mulch depth at multiple points across the playground, adding material where compression or displacement has reduced coverage below safety thresholds. Heavy use areas typically require 1-2 inches of additional rubber mulch every 18-24 months. Rake high spots and redistribute material to maintain level surfaces, preventing trip hazards from uneven coverage.
Addressing Common Maintenance Issues
Several maintenance challenges can arise with rubber mulch playgrounds, though most are easily resolved with prompt attention. Mulch displacement from vigorous play concentrates material around activity peripheries while creating thin spots in central zones. Rake and redistribute monthly during high-use seasons to maintain consistent depth. Some rubber particles will inevitably migrate outside border containment despite your best efforts. Sweep or blow this material back into the play area weekly, or apply it in landscaped areas where it provides weed suppression benefits.
Weed growth occasionally penetrates landscape fabric, particularly around border edges where fabric may have torn or shifted. Address emerging weeds immediately by hand-pulling when small, as established plants develop deep roots that disturb the entire mulch layer. For persistent weed problems, apply a playground-safe pre-emergent herbicide once annually in early spring. If you notice drainage issues with standing water after rain, the problem typically stems from compacted underlying soil or clogged fabric. In severe cases, remove sections of rubber mulch, improve drainage with additional stone layers, and reinstall the surface material.
Refreshing Appearance and Preventing Fading
Quality rubber mulch maintains its vibrant color for a decade or more, but some fading naturally occurs with prolonged UV exposure. Restore appearance by thoroughly raking the surface to flip buried material and expose fresh colors. This simple maintenance task takes 1-2 hours for typical residential playgrounds and dramatically improves aesthetics. For playgrounds showing significant fading after 8-10 years, consider adding a 1-2 inch top layer of new colored mulch rather than complete replacement, extending the total lifespan another 5-7 years.
Remove stains from spilled drinks, food, or other substances promptly to prevent permanent discoloration. Most rubber mulch responds well to simple cleaning with water and mild dish soap, applied with a soft brush for stubborn spots. Avoid harsh chemicals or petroleum-based cleaners that can degrade the rubber material. For comprehensive cleaning of heavily soiled surfaces, use a pressure washer on low setting (below 1,500 PSI) to avoid displacing material. Proper aesthetic care maintains your playground’s attractive appearance throughout its service life, encouraging continued active play and protecting your investment.
Safety Considerations and Health Concerns
Addressing the question of whether rubber mulch playground surfaces are toxic requires examining current scientific evidence and regulatory standards. Extensive testing by the EPA and independent laboratories confirms that properly manufactured rubber mulch from reputable suppliers contains negligible levels of volatile organic compounds and heavy metals. The Consumer Product Safety Commission has evaluated rubber playground surfaces since the early 2000s, consistently finding them safe for children when installed and maintained according to manufacturer guidelines.
Some concerns about rubber mulch health effects stem from older products made before 2015 when manufacturing standards were less stringent. Modern production processes as of 2026 include thorough washing to remove contaminants, metal extraction to eliminate steel belt remnants, and testing for harmful substances. Choose products certified by the International Play Equipment Manufacturers Association or those meeting ASTM F3012 standards. These certifications guarantee your rubber mulch has been tested for lead content, accessible heavy metals, and other potentially harmful substances, providing peace of mind for parents and facility managers.
Understanding Temperature and Heat Concerns
The downside of using rubber mulch most frequently cited involves surface heating in direct sunlight, particularly with dark-colored materials. Black rubber mulch can reach temperatures 20-35 degrees higher than ambient air on sunny summer days, potentially causing discomfort or minor burns on exposed skin. This concern is legitimate but manageable through proper planning and color selection. Light-colored rubber mulch reflects more solar radiation and remains 10-15 degrees cooler than dark alternatives, making it preferable for playgrounds in southern climates or those lacking shade coverage.
Implement heat mitigation strategies including shade structures, strategic tree planting, or shade sails positioned over high-contact areas. Schedule intensive playground use during cooler morning and evening hours during peak summer months. Some manufacturers now offer specially formulated rubber mulch with cooling additives that reduce surface temperatures by 8-12 degrees compared to standard products. For playgrounds that must accommodate midday summer use, consider hybrid surfacing approaches using poured-in-place rubber or synthetic turf in the hottest zones while maintaining loose rubber mulch in shaded areas.
Finding Quality Installation Services Near You
Locating experienced contractors for rubber mulch playground installation near me requires researching local companies with specific expertise in playground safety surfacing. Start by contacting landscape companies, playground equipment installers, and specialized safety surfacing contractors serving your region. Request detailed information about their experience with rubber mulch installations, asking for references from projects completed within the past two years. Qualified installers should readily provide proof of liability insurance, workers’ compensation coverage, and any relevant safety certifications.
Evaluate potential contractors based on their knowledge of current safety standards, their approach to site preparation and drainage, and their warranty offerings. Quality installation services include comprehensive site assessment, proper base preparation, professional-grade materials, and post-installation safety testing. Obtain written quotes detailing all costs including materials, labor, site preparation, and any additional services like border installation or drainage improvements. Compare at least three quotes, but avoid automatically choosing the lowest bid without verifying the contractor’s qualifications and reputation. The difference between mediocre and excellent installation directly impacts safety, longevity, and long-term maintenance costs.
Related video about rubber mulch playground installation
This video complements the article information with a practical visual demonstration.
Most asked questions about rubber mulch playground installation
What do you put under rubber mulch for a playground?
Under rubber mulch, install a commercial-grade non-woven geotextile landscape fabric rated at 3-4 ounces per square yard directly on compacted soil. This weed barrier allows water drainage while preventing plant growth. In areas with poor drainage, add a 2-3 inch layer of crushed stone or pea gravel between the compacted base and fabric. The fabric should extend up the inside of border containment and overlap seams by at least 12 inches. For optimal results, compact the native soil thoroughly before laying any materials to prevent settling and maintain consistent rubber mulch depth across the play area.
How to lay rubber mulch for a playground?
Begin by preparing the site: remove vegetation, compact the soil, install borders, and lay landscape fabric. Calculate the amount needed based on your playground area and required depth. Spread rubber mulch evenly using a rake, starting from the farthest point and working backward. Check depth frequently with a measuring tool, ensuring minimum coverage of 6 inches for equipment with fall heights up to 4 feet, 9 inches for 4-7 feet, and 12 inches for 7-10 feet. Add 1-2 extra inches to compensate for settling. Focus additional material beneath swings and at slide exits where impact is greatest. Allow 48-72 hours for initial settling before final depth verification.
What is the downside of using rubber mulch?
The primary downside of rubber mulch is heat retention, especially with dark colors in direct sunlight. Black rubber mulch can become 20-35 degrees hotter than ambient temperature on sunny days, potentially causing discomfort. Other concerns include higher upfront costs compared to wood mulch (though offset by 12-15 year lifespan), occasional rubber odor during hot weather, and the material’s non-biodegradable nature. Some particles may migrate outside borders despite containment efforts. However, these drawbacks are manageable through proper color selection, shade structures, adequate borders, and choosing certified products from reputable manufacturers that meet current safety standards.
How deep does rubber mulch need to be for a playground?
Required rubber mulch depth depends on your playground equipment’s critical fall height. For equipment up to 4 feet high, install a minimum of 6 inches of compressed rubber mulch. Equipment 4-7 feet high requires 9 inches, while 7-10 feet needs 12 inches. These depths meet ASTM F1292 safety standards for impact attenuation. Always add 1-2 inches extra during installation to account for 10-15% compression during the first months of use. Measure from the highest designated play surface on each piece of equipment to determine requirements. High-traffic areas beneath swings and at slide exits benefit from an additional 1-2 inches beyond minimum specifications.
How much does rubber mulch installation cost for a playground?
In 2026, rubber mulch installation costs range from 8 to 15 dollars per square foot for complete professional installation including site preparation, borders, fabric, and materials. Material costs alone run 5.50-9.00 dollars per cubic foot for bulk rubber mulch. A typical 200-square-foot residential playground requiring 6 inches depth costs approximately 1,600-3,000 dollars total when professionally installed, or 800-1,400 dollars for DIY material costs only. Factors affecting price include project size, site preparation complexity, drainage requirements, color selection, and regional labor rates. Commercial installations with stricter safety requirements and certification needs cost proportionally more due to additional testing and documentation requirements.
Is rubber mulch safe and non-toxic for children?
Modern rubber mulch certified by reputable organizations is safe and non-toxic for playground use. Products meeting ASTM F3012 standards and certified by the International Play Equipment Manufacturers Association undergo rigorous testing for heavy metals, volatile organic compounds, and other harmful substances. The EPA and Consumer Product Safety Commission have extensively evaluated rubber playground surfaces, consistently finding them safe when properly manufactured and installed. Choose products from established manufacturers who provide test documentation and certifications. Properly installed rubber mulch has been safely used in thousands of playgrounds across the United States for over two decades, with comprehensive studies supporting its safety for children.
| Installation Phase | Key Requirements | Safety Benefit |
|---|---|---|
| Site Preparation | Compacted base, landscape fabric, proper drainage | Prevents settling and maintains consistent depth |
| Border Installation | Secure containment 2-3 inches above mulch surface | Retains safety surfacing in critical fall zones |
| Proper Depth | 6-12 inches based on equipment fall height | Reduces head injuries by up to 75% |
| Wear Mat Integration | Rubber tiles in high-impact zones | Extends lifespan and maintains protection |
| Regular Maintenance | Quarterly inspections, periodic replenishment | Ensures continued compliance with safety standards |
| Material Quality | ASTM certified, reputable manufacturer | Guarantees non-toxic composition and durability |